In web applications, syntax highlighting is the process of wrapping the crucial parts of the code with inline HTML
elements (usually <span>) with certain formatting (usually applied through CSS classes) in order to
make each part easily distinguishable just by skimming through the code.
The exact parts that are highlighted differ per language and per application.
To accomplish this, a script needs to tokenize the input and wrap certain tokens with <span> elements
with appropriate classes. From that point on, the CSS will take care of the rest.
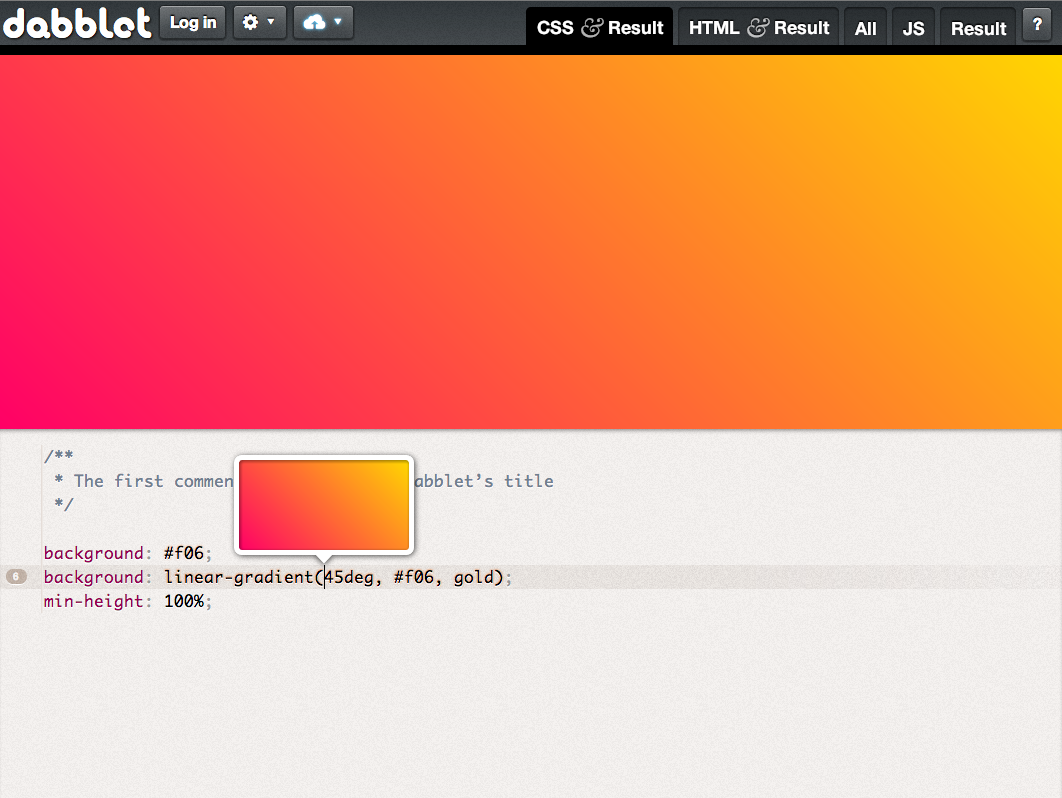
For Dabblet, a new flexible syntax highlighter was written from scratch and released as a separate open source script
under the name Prism, since all existing ones were too complicated, buggy and
included a lot of cruft for older browsers, which Dabblet doesn’t support. Prism was released publicly as an open source
project in July 2012.
Tokenization*
Each supported language is defined in a separate file, as a set of key-value pairs
where the key is the token name and the value is a regular expression that matches it.
There are a few extensions to this syntax, the main of which will be examined in section 4.2.1.1.
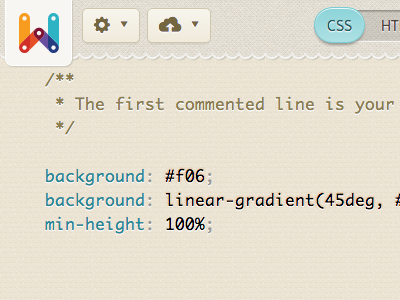
For example, here’s the CSS definition which is pretty basic:
				Prism.languages.css = {
					'comment': /\/\*[\w\W]*?\*\//g,
					'atrule': /@[\w-]+?(\s+[^;{]+)?(?=\s*{|\s*;)/gi,
					'url': /url\((["']?).*?\1\)/gi,
					'selector': /[^\{\}\s][^\{\}]*(?=\s*\{)/g,
					'property': /(\b|\B)[a-z-]+(?=\s*:)/ig,
					'string': /("|')(\\?.)*?\1/g,
					'important': /\B!important\b/gi,
					'ignore': /&(lt|gt|amp);/gi,
					'punctuation': /[\{\};:]/g
				};
Since neither HTML nor CSS and JavaScript are regular languages, there will be false positives or true negatives in any
attempt to parse them with regular expressions. However, in practice, Prism does a pretty good job at keeping
them to a minimum and failing gracefully in those rare unfortunate cases.
Using a complete, bulletproof parser would increase processing time and given the frequency the
highlighting script needs to run, this is much more important than absolute correctness. This is the reason why
most syntax highlighters for the Web, as well as many code editors, work in a similar fashion.
By convention, each language definition resides in a separate file. Upon download, Prism’s website provides a build
script to concatenate only the selected languages and plugins in one file.
The tokenization is performed through a simple iterative algorithm, like the following (in pseudo-JavaScript, simplified):
				Prism.tokenize = function(text, defs) {
					// Initialize the array with just one item: the full code
					var tokenized = new Array(text);

					for (var type in defs) {
						var pattern = defs[type];

						for (var i=0; i<tokenized.length; i++) {
							var str = tokenized[i];

							if (!(str instanceof Token) && pattern matches str) {
								var index = index of match,
								    length = length of match,
								    beforeToken = str.substring(0, index),
								    afterToken = str.substring(index+length+1),
								    token = new Token(matched substring, type);

								// Replace string with its 3 pieces
								tokenized[i] = beforeToken;
								tokenized.pushAt(i+1, token);
								tokenized.pushAt(i+2, afterToken);
							}
						}
					}

					return tokenized;
				}
The algorithm above progressively breaks down the single input string into an array of strings and Token objects.
Token objects include a string and the token type, and are the parts of the code which are going to be
wrapped in spans. Every iteration of the inner loop either leaves the string intact or it breaks it down in two strings
and a token. The strings are then processed further by subsequent iterations, whereas Token instances will not be altered.
The static method Token.stringify is responsible for producing the necessary
HTML. It’s initially called on the array and then calls itself for every item, to produce the necessary substrings
which are then joined into the final result. Here’s the algorithm in pseudo-JavaScript (simplified):
				Token.stringify = function(o) {
					if (o is string) {
						return o;
					}

					if (o is array) {
						return o.map(Token.stringify).join('');
					}

					// If we’re here, o is a Token object
					return '<span class="token ' + o.type + '"'>' +
					       Token.stringify(o.content) + '</span>';
				};
It may seem slow, but in practice this algorithm has proved quite fast.
To further improve performance, DOM interaction is kept to a minimum of once per script run. The entire highlighting
operates on a string, which is split into multiple array chunks with each iteration. Then, only at the end, the array is
joined into a string which is injected inside the editor’s <pre> element.
* Note: It’s important to point out that Prism’s “tokens” do not necessarily correspond to parser tokens,
nor to tokens as defined in Compiler theory.
Nesting “tokens”
The way the above algorithm works is simple and easy to understand, but its not without its limitations.
A token cannot have other tokens inside it, since once its wrapped in a Token object, it’s not processed further.
This is mitigated by explicitly allowing tokens to be “nested”. So far, we’ve shown the following simple notation to
define a token:
type: /regex/
However, tokens can also be defined in the following, “extended” syntax:
					type: {
						pattern: /regex/
					}
The two examples above are functionally equivalent, but the latter allows for more options, the most powerful
of which is the inside property, which accepts another object literal, with the exact same syntax.
This means it may have its own inner tokens as well, a feature used by the built-in Markup definition, with up to two levels deep nesting.
As an example, suppose we wanted to highlight URL-looking strings in CSS comment tokens. Then, we could modify the comment token from
the CSS definition like so:
					'comment': {
						pattern: /\/\*[\w\W]*?\*\//g,
						inside: {
							'url': /\b([a-z]{3,7}:\/\/|tel:)[\w-+%~/.]+/
						}
					},
Of course, this means the tokenize() algorithm has to become recursive to accommodate this feature.
This is done by replacing the new Token() line with:
					var subDefs = defs[type].inside;
					var token = new Token(subDefs !== undefined?
					            	  Prism.tokenize(matched substring, subDefs)
					            	: matched substring,
					            type);
Even though nesting tokens is allowed, it should be avoided, as it can cause a performance hit:
When tokens are not nested, the code inside
every token is not processed further, decreasing the code that needs to be examined with every step.
Contrary, when child tokens are allowed, every such token invokes a recursive call of the highlighting function, albeit
with much fewer definitions.
However, when the parent tokens are large, nesting can actually aid performance, due to nested tokens
being processed against a much smaller token dictionary which usually consists of simpler regular expressions.
Extensibility
One of Prism’s goals was extensibility, not only in defining new languages, but also in extending its core functionality.
This is achieved by having “hooks” at several key points throughout its code. Plugins can then assign functions that need to
run in those hooks by calling Prism.hooks.add() with the hook name and a function with the code to run.
The Prism core takes care of calling any such functions, and passing them the key parameters as properties
of an env object.
Plugins can even used in language definition files, to enhance functionality. For example, the markup definition includes the following
small plugin, to show the symbol that corresponds to HTML entities, as a tooltip:
					Prism.hooks.add('wrap', function(env) {

						if (env.type === 'entity') {
							env.attributes['title'] = env.content.replace(/&/, '&');
						}
					});
Several Prism plugins already exist:
- A plugin to make URLs and emails clickable and parse Markdown links
- A plugin to highlight specific lines and line ranges
- A plugin to show invisible characters like tabs, spaces etc
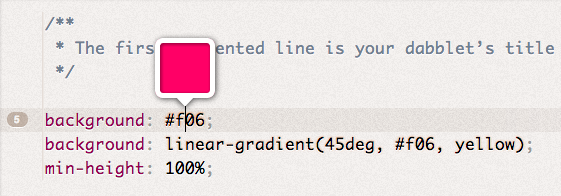 Color (examples:
 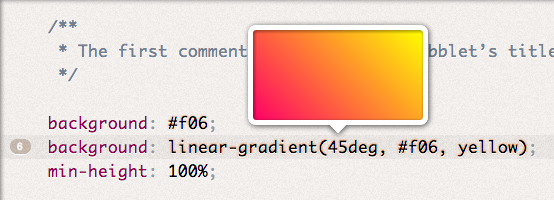 Gradient (example:
  Absolute length (examples:
 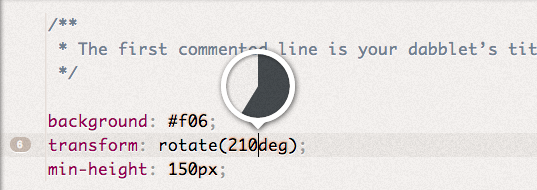 Angle (examples:
 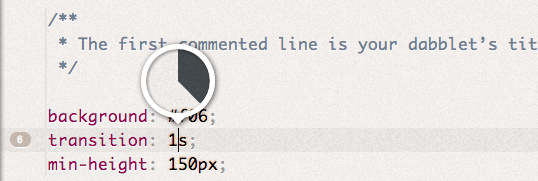 Duration (examples:
 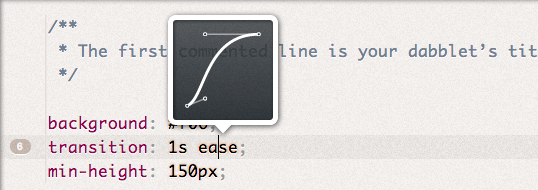 Cubic bezier easing function (examples:
 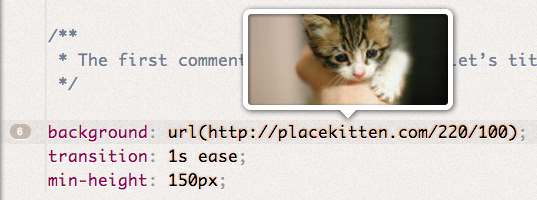 Picture URL (example:
 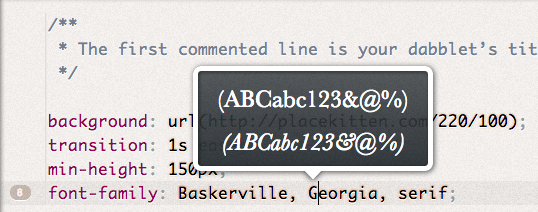 Font family (example:
 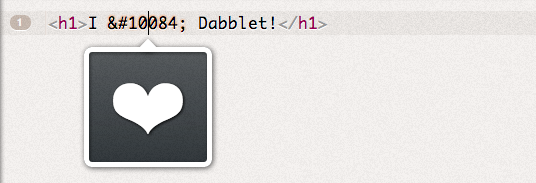 Character entity (examples: